← Back to home

Guide · 10 steps · iPhone

From install to post-show follow-up

Four phases: prepare, capture on the floor, track follow-ups, export to your CRM. Everything works offline on your phone.

1 Prepare 2 Capture 3 Follow up 4 Export

Full user manual (every screen, every field) →

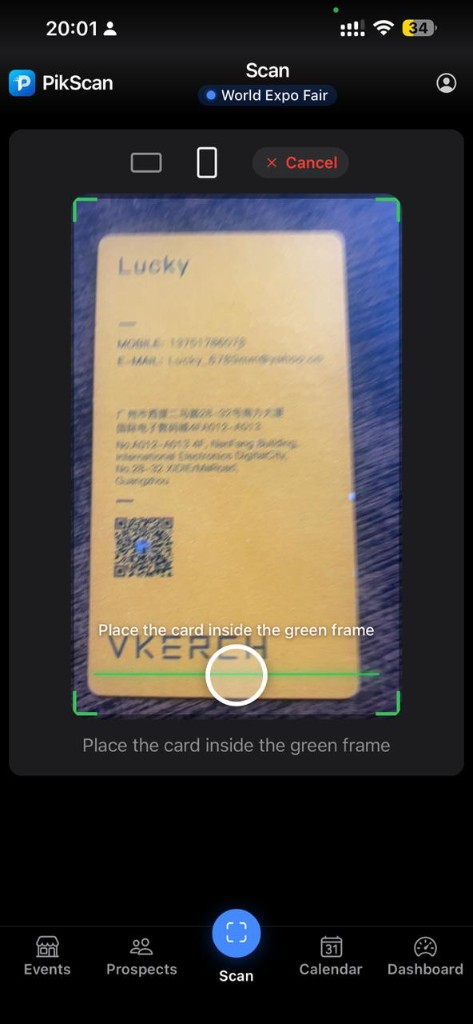
PikScan OCR scan framing a business card at World Expo Fair
Phase 1 · Prepare 01

Create your event

Before you arrive on the floor, install PikScan and create the event that will group all your scans.

  1. Download the app and complete the getting-started checklist (event, card, categories, first scan).
  2. Events tab → + button → name, city, dates, photo and optional ambiance color (e.g. World Expo Fair).
  3. Select the active event. Swipe left to edit or delete.
  4. Also set up your card via Settings → Card (CARD READY badge).
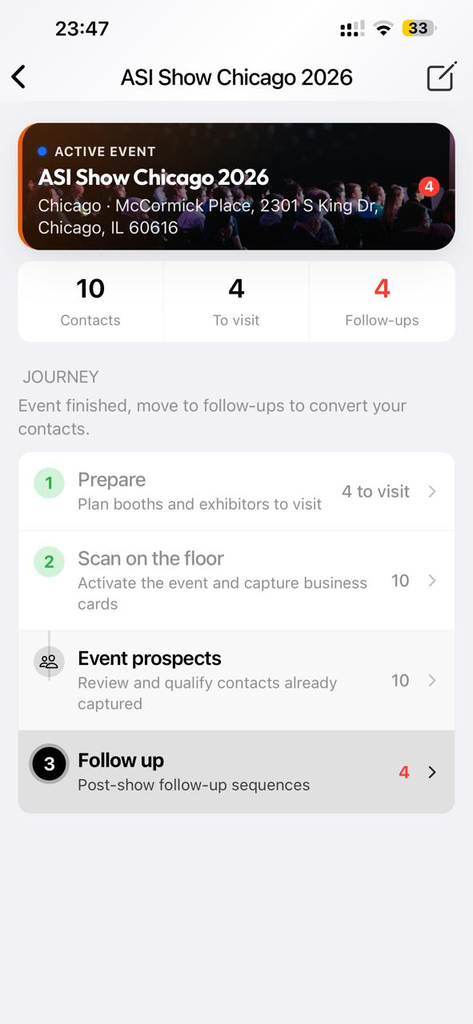
Events list with World Expo Fair active
Phase 1 · Prepare 02

Build your visit plan

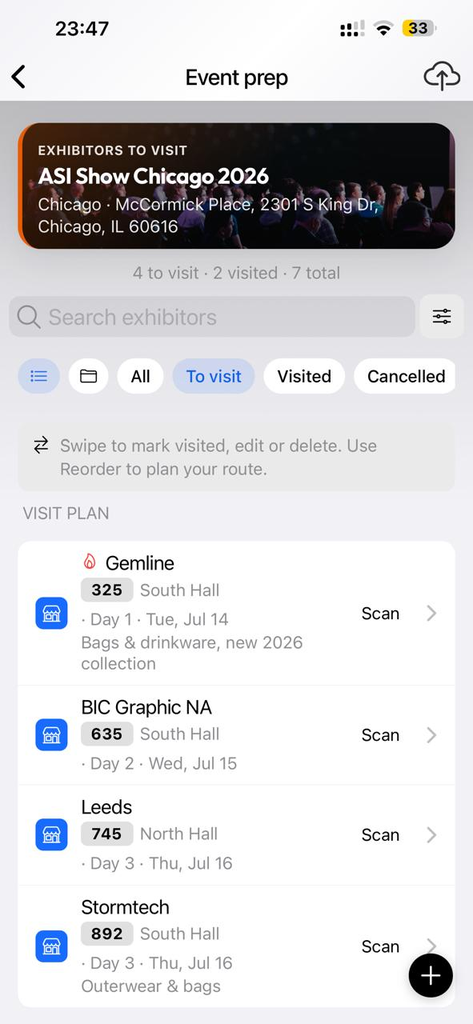
List exhibitors to visit before you arrive: stand numbers, priorities and route order.

  1. From an event card, tap the exhibitor count or Event prep.
  2. Import list: tap Import list to load a CSV or Excel file from the organizer. Columns auto-map (company, stand, hall, priority, visit day/time, notes, tags). Preview duplicates, then add to list or replace list. Download template shares the PikScan CSV model.
  3. Add company, stand number, hall/aisle, priority (high / normal / low), visit time and notes manually if needed.
  4. Switch between list and folder views by category (preference saved).
  5. Use Reorder to plan your booth route. Filter by to visit, visited or cancelled.
  6. Planned visits appear in the Calendar tab.
  7. On the floor: mark visited, scan at stand or link a scanned contact to a planned exhibitor.
  8. Free: 25 exhibitors per event. Pro: unlimited.
Calendar week view with planned exhibitor visits
Phase 1 · Prepare 03

Organize prospect categories

Create a classification tree to filter contacts by sector, source or any axis useful at trade shows.

  1. Settings → Categories → create root categories (e.g. Sector, Source).
  2. Add subcategories under each root (e.g. Food, Pharma under Sector).
  3. When saving a contact, assign category and subcategory in the scan form.
  4. Filter the Prospects list by category during and after the show.
  5. View as a list or folders (category tree).
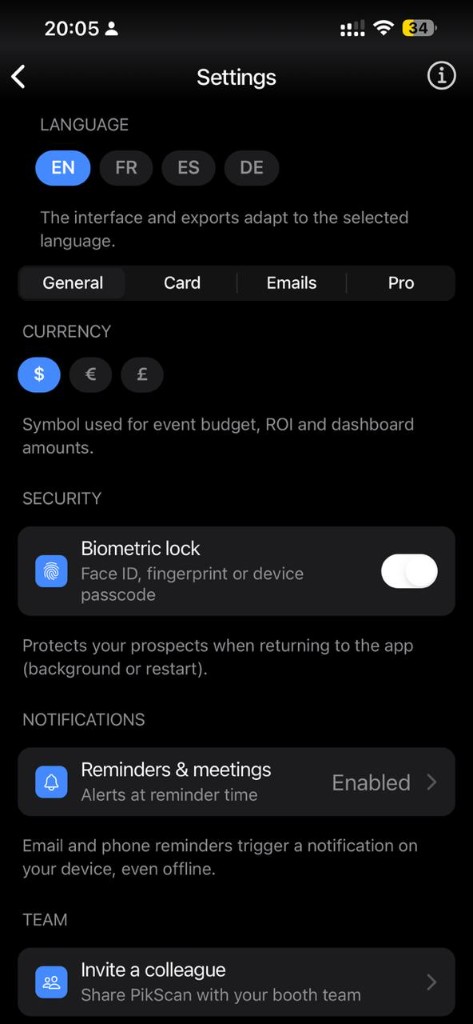
Settings General tab, language, currency and categories
Phase 2 · Capture 04

Scan a business card

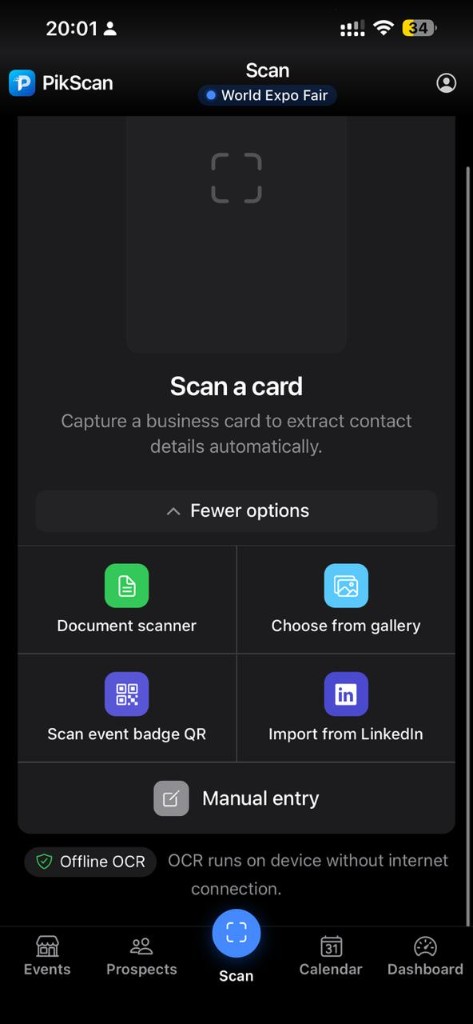
On-device OCR: no connection needed. Frame the card in the green box and let PikScan extract the details.

  1. Scan tab (center black button).
  2. Check the active event or tap Choose or create an event.
  3. Frame inside the green box, or use More options → Document scanner for auto edge detection, crop and result orientation.
  4. Offline OCR badge: 100% on-device. Also: badge QR, LinkedIn or vCard exchange.
Scan tab with OCR, document scanner and badge QR options
Phase 2 · Capture 05

Qualify the contact

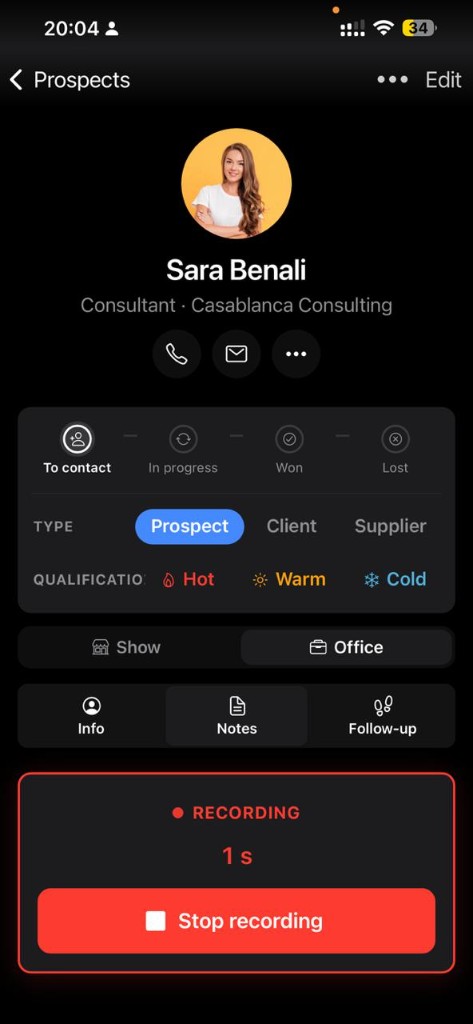
Tag each conversation on the spot: type, category, hot/warm/cold and pipeline status.

  1. Save prospect screen: check pre-filled ESSENTIAL fields.
  2. TYPE: Prospect, Client or Supplier (a contact can combine client and supplier roles).
  3. CATEGORY: pick category and subcategory if configured.
  4. QUALIFICATION: Hot, Warm or Cold.
  5. Contact detail: Won/Lost pipeline, named voice note, transcribe voice to text (iPhone), Welcome, WhatsApp and WeChat.
  6. Share contact: vCard QR or .vcf file via AirDrop, email or message.
  7. For Supplier contacts: attach catalogs (link, PDF or photos) with optional custom names.
Prospect detail, type, Hot/Warm/Cold qualification and voice note
Phase 1 · Prepare 06

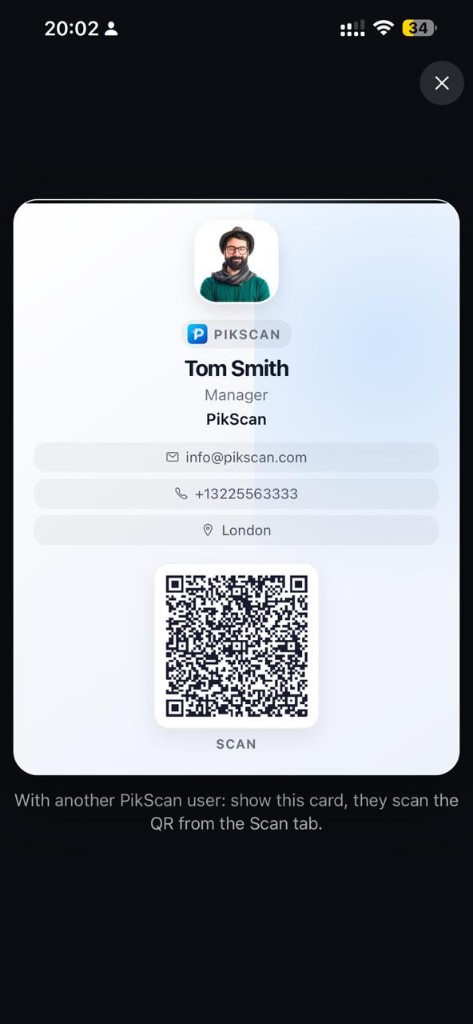
Digital vCard

Exchange contact details by QR with other PikScan users: no paper needed.

  1. Settings → Card or My business card → Edit.
  2. Name + email or phone minimum; optional WhatsApp, WeChat, address and location (including GPS fill).
  3. My card tab: full-screen display with QR SCAN.
  4. Rotate to landscape on the booth: they scan from their Scan tab.
Digital vCard with QR code for booth exchange
Phase 3 · Follow up 07

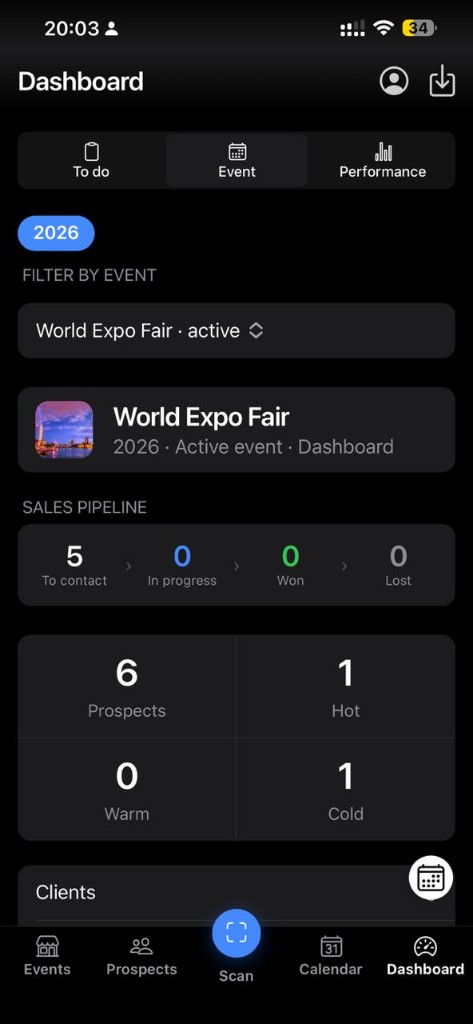
Dashboard & pipeline

See today's actions and performance per event.

  1. Dashboard tab: To do, Event, Performance.
  2. Upcoming meetings, pending reminders and welcome emails.
  3. Estimated ROI if event budget was set.
  4. Prospects tab: search, filters and export.
Dashboard Event tab, pipeline and prospect counts
Phase 3 · Follow up 08

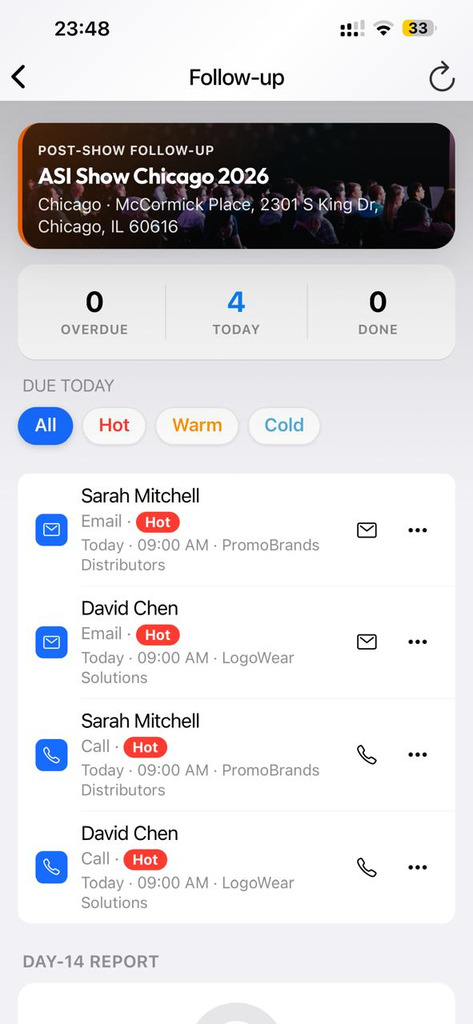
Follow-ups & calendar

Schedule follow-ups and customize your welcome email before leaving the show.

  1. Calendar: Day, Week, Month views, trade shows, appointments, reminders, samples and planned exhibitor visits (color by type).
  2. Settings → Emails: welcome, sample, quote and validation templates: choose writing language independently of the app interface. Variables {{firstName}}, {{company}}, {{sender}}.
  3. Enable Reminders & meetings (Enabled).
  4. Welcome button on contact detail sends the pre-filled email.
Welcome email template with {{firstName}} variables
Phase 4 · Export 09

Export to Excel or CRM

Retrieve your contacts as soon as you're back from the show.

  1. ProspectsExport icon or button.
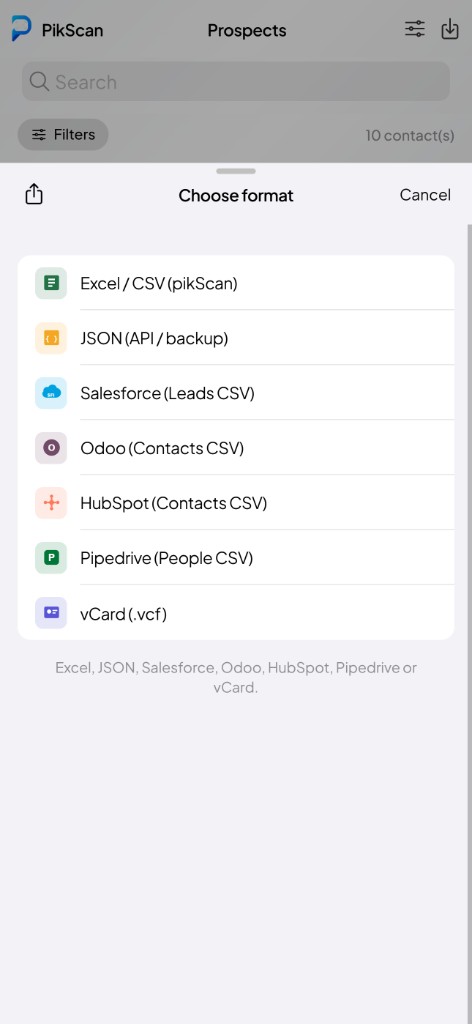
  2. Native Excel (.xlsx) (free, max 10/export), JSON, vCard or CRM (Pro). Calendar export as Excel or ICS.
  3. Scope: active event, all events or filtered selection.
  4. Settings → DATA: export .pikscan (JSON) or .pikscan.zip (media organized per prospect). Free: max 10 contacts. Pro: unlimited.
  5. Restore a backup by merge or replace all: ideal when changing phones.
Export formats, Excel, JSON, CRM and vCard
Phase 4 · Export 10

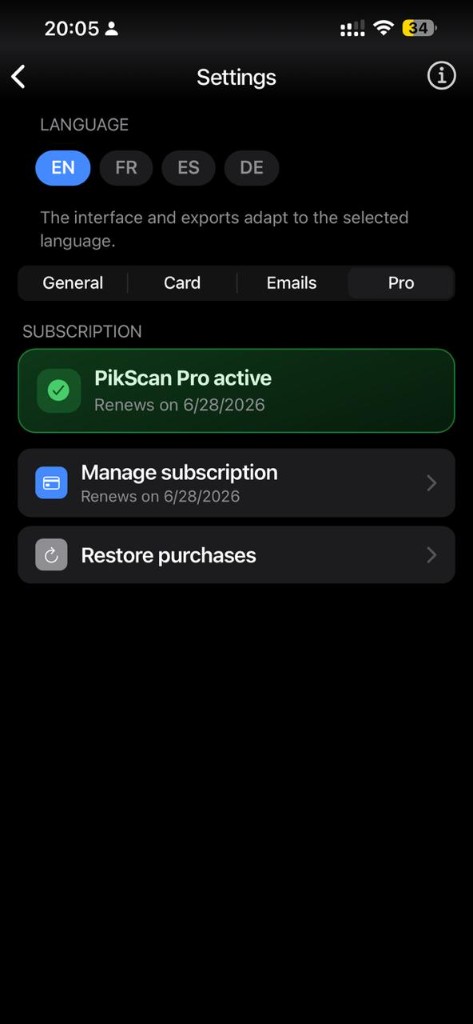
Settings & PikScan Pro

Language, biometric security and subscription.

  1. General: language, currency ($ € £), Face ID lock.
  2. Free: 1 event, 25 contacts, 25 exhibitors per event (prep) · Pro: $59.99/year, unlimited.
  3. UPGRADE TO PIKSCAN PRO: 7-day trial.
  4. Manage subscription, Restore purchases, Invite a colleague.
PikScan Pro subscription active